一个免费的 Newsletter 转 RSS 方案
我之前都是使用自己的邮箱订阅 Newsletter,但是每天好多邮件发送给你,混杂在一些提醒和交流邮件中,怪麻烦的。
也尝试过好几个订阅 newsletter 的应用,也了解了 mail2rss 这方面的网站和开源项目,一直没有啥好的解决方案。
有一天偶然看到 testmail.app 这个可以让开发者测试邮件服务的网站,每个用户可以有一个 namespace,然后可以构造出无限个邮件地址,也有相应的 API 用来过滤邮件等等。
testmail 免费版每个月可以接收 100 封邮件,邮件能保存一天。但是只需要设置 RSS 阅读器请求频率低于一天,肯定就能接收到所有邮件了。
那么项目思路就有了,使用 serverless 实现一个函数,这个函数每次接受 RSS 阅读器请求时都去抓取最新的邮件列表,然后响应一个 RSS 格式的 XML 文档即可。
sequenceDiagram
loop 每十分钟
RSS 阅读器->>Serverless 函数: a.获取 tag 的最新 RSS 内容
activate Serverless 函数
Serverless 函数->>testmail.app: b.请求 tag 对应的邮件列表
testmail.app-->>Serverless 函数: c.返回邮件列表
Note right of Serverless 函数: 1.处理邮件列表、内容等
Serverless 函数-->>RSS 阅读器: d.根据邮件列表生成 RSS 并返回
deactivate Serverless 函数
end
有了整个项目的思路之后,现在就开始根据 testmail.app 的 API 来写功能就行了,Serverless 选择使用 Cloudflare workers,每天十万次请求数,I / O 时间不限。
- testmail.app:https://testmail.app/
- Cloudflare Workers:https://workers.cloudflare.com/
开始使用 testmail.app
名词解释
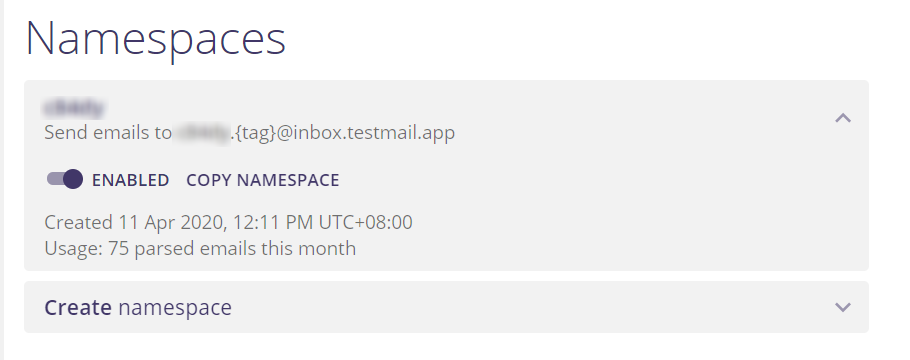
注册登录后就能看到一个你自己的 namespace。
testmail.app 里对 namespace 是这么描述的:
testmail.app 会接收发送到 {namespace}.{tag}@inbox.testmail.app 的邮件,{namespace} 是分配给每个人的独自的一个 id,{tag} 是你自己随便输入的,之后我们可以通过 API 来过滤 tag 从而获取我们需要的邮件。
namespace
每个 namespace 都支持无限数量的电子邮件地址。
举个例子:假设你的 namespace 是 acmeinc;然后你发一封邮件到 [email protected],再发另一封邮件到 [email protected],然后你都能在 acmeinc 这个 namespace 下查到这两封邮件,只是两封邮件带的 tag 不同。
tag
tag 可以是任意内容。
举个例子:假设你要测试一下新用户注册的功能,你就可以使用 [email protected] 这个邮箱创建用户名为 John 的新用户,通过 [email protected] 这个邮箱创建用户名为 Albert 的新用户。
之后查询 API 的时候,可以过滤指定标签来查看发给每个用户的邮件。
使用 API
文档地址:https://testmail.app/docs/
testmail.app 支持直接参数查询和 graphql 两种查询方式。两种方式都是直接获取一个 json 格式的响应,里面有邮件列表,每个邮件的内容,附件,元信息等等。
进行查询之前要获取一个 API Key,也是登录之后在网页上就能看到了,把 API Key 填到 headers 的 Authorization 即可。
这里就不详细说了,就是查 API 获取想要的邮件的内容,比如我们使用 quartz 这个 tag 订阅 QuartZ,那我们就只查这个 tag 的邮件即可。
js 实现的请求邮件:
1 | const testmailNamespace = 'xxxxx'; |
注意一下这里用的是 GraphQL 的请求方式即可。之后只需要调用 await TestMail.getMails(tag) 即可获取相应 tag 的邮件。
开始使用 Cloudflare Workers
按照我们的想法,我们需要 Serverless 函数帮我们做一个中间层,根据 RSS 阅读器的请求生成 RSS 内容。
所以我们就需要:
- 获取用户请求的 tag
- 请求 tag 对应的邮件列表
- 返回一个 XML 格式的网页。
第一步就是解析用户请求的地址,然后获取出 tag 就行。比如用户请求的 mail2rss.test.workers.dev/tenjs,我们就要把 tenjs 提取出来即可。
Cloudflare Workers 中可以通过 event.request.url 拿到用户请求的完整 URL,如果你使用的是其他的 Serverless 服务,如果是 koa-like 的话,一般都是也是通过 Request 拿到 url。
1 | const {request} = event; |
第二步请求邮件列表我们已经写好了。
第三步就是生成一个 XML 格式的响应,再返回即可。
实现生成 XML
这里我们没有使用模板引擎,直接拼接字符串就行了。
首先我们得知道 RSS 的文件格式,这里参考了 RSSHub 的文件内容。然后写一个 makeRss 函数,拼接生成字符串就行。
1 | async function makeRss(emails, tag) { |
然后返回响应:
1 | let responseXML = await makeRss(data.data.inbox.emails, requestTag); |
总结
其实思路也很简单,代码也很简单。
完整代码见:https://github.com/bytemain/mail2rss
参考链接
- DIYgod/RSSHub https://github.com/DIYgod/RSSHub
- testmail.app https://testmail.app/
- testmail.app Documentation https://testmail.app/docs/
- Cloudflare Workers https://workers.cloudflare.com/